Project: Race Quad Build
For the past two years, the quadcopter I built has served me well. It’s had a lot of flight time, including had a few crashes and repairs, and still it flies very well. However, a couple of months ago I decided now was the time to venture outside of line-of-sight flying and into the world of FPV (First Person View).
Although it’s only been two years since I built my last quadcopter, a lot has changed in the multirotor hobby in that time. The main trend is that FPV, flying a drone through its point of view via a video link, has become much more popular. This has lead to the development of drone racing, where small, precisely tuned quads fly around challenging aerial tracks.
The ‘race quads’ used in drone racing and freestyle flying tend to be small (around 250mm in diameter) with frames made from crash-proof materials such as carbon fibre. There are many variations of frames in this style, with more being designed all the time. Some examples include the Lumenier QAV250 and ImpulseRC Alien.
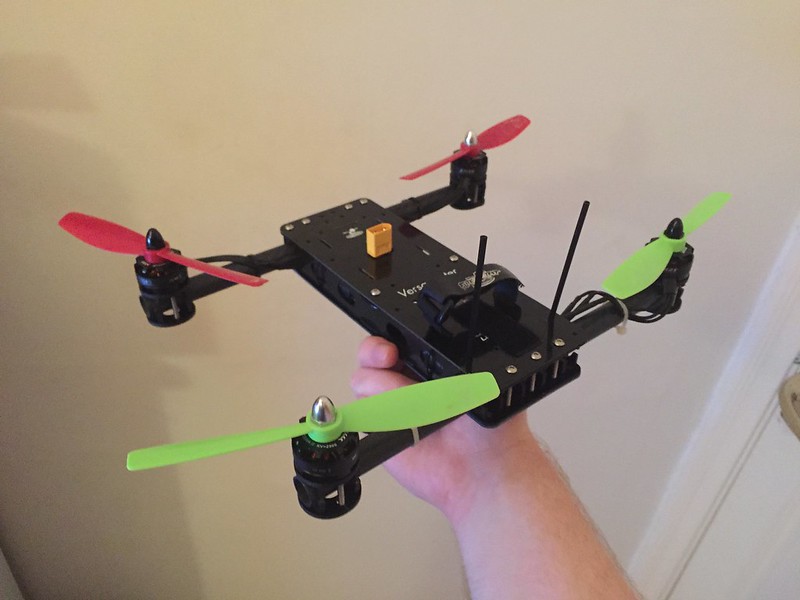
The frame that really appealed to me as soon as it was released was yet another Flite Test product, the Versacopter Race Quad. At 280mm, this frame is around half the size of my previous build, and it opts for carbon fibre and tough G10 plastic rather than wood. Thanks to the great build video provided, it didn’t take long to assemble and the built-in power distribution made soldering the electronics very neat and tidy. Below is a listing of the parts I used.
- Flite Test Versacopter V1 Quad Kit
- Emax MT2204-II 2400kv “Cooling Series” Motors
- Emax 12A BLHeli Series ESCs
- DAL ‘Unbreakable’ 6045 Propellers
- Naze32 Acro Control Board
- FrSky X4R-SB Receiver

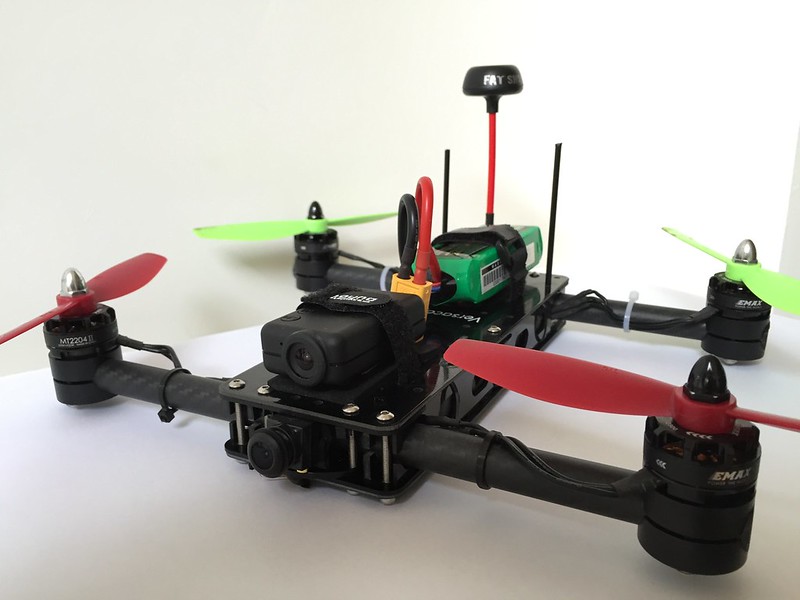
When the first version of the Versacopter started selling some people were reporting durability problems with some parts of the frame, and Flite Test set about making arrangements to put together a stronger Versacopter V2 and a an upgrade kit for the Versacopter V1. They ended up coming up with a design that used some very nice machined aluminium parts, so I bought the upgrade kit to add some extra resilience to the quad. The new aluminium motor mounts can be seen in the second photo further down the page.
Since I would be flying this quad line-of-sight to begin with, I adorned it with red and green propellers to help me maintain orientation. One of the advances in the hobby over the last couple of years that can’t be ignored is the increase in quality of affordable control boards. For this build I went for a Naze32 loaded with the open source Cleanflight software.
Cleanflight is a much improved rewrite of MultiWii, one of the early multirotor control packages, which supports 32-bit hardware and uses modern software development practises. It comes with a fantastic cross-platform GUI for configuring every aspect of your drone. I used this for the initial set up, including setting up SBUS communication with my FrSky X4R-SB receiver and tuning my PID values.
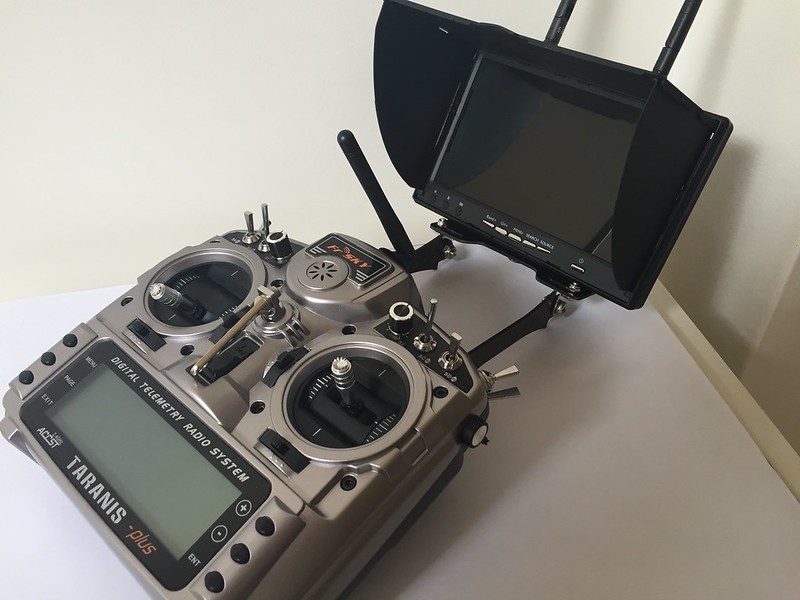
Once I’d taken my new quad for a few line-of-sight flights, including a few crashes (with no damage fortunately), I decided it was time to add an FPV setup. The most expensive part of any FPV system is typically the viewing device, many race quad pilots use video goggles such as those by Fat Shark. Instead of splashing out on FPV goggles, I decided to start off with an FPV monitor I could attach to the front of my transmitter. This has the added benefit that when I do upgrade to goggles, I can use the monitor to allow friends or interested passers by to see what I’m seeing and enjoy the FPV experience.

The monitor I ended up getting was the Eachine LCD5802S, which features a sunshade and built-in battery and 5.8GHz receiver. I attached this to my FrSky Taranis using a FlyCamOne mount. The Taranis with the attached monitor is quite heavy, so I tend to prefer sitting down while flying with it.
As for the transmitting side of the system, I fitted a very compact CC1568 600TVL wide-angle camera to the front of my quad. This is then hooked up to an Aomway TX25 5.8GHz video transmitter with an ImmersionRC SpiroNET antenna. I also have my Mobius Action Cam mounted on the front of the quad for recording HD video. It is possible to send the video feed from the Mobius to my video transmitter, removing the need for an additional camera, however since this introduces considerable latency to the video feed I decided not to do it.
In terms of batteries I’m using 3S LiPos, I have a couple of Turnigy 2200mAh ones from my larger quadcopter which it flies quite well with, and I’ve also bought some 1400mAh Multistars which weigh considerably less and so despite the smaller capacity I get a comparable flight time. My flight time ranges from 5 minutes if I’m really punching the throttle to 9 minutes with slower flying.

It’s worth noting that before attempting to fly this quad FPV I put quite a few hours into practicing on the simulators FPV Freerider and Liftoff. Both are really great and very affordable, I highly recommend them. Liftoff has a good variety of tracks and models video noise which is a nice detail, and FPV Freerider is very good if you have an older machine that doesn’t run games too well.
Between now and when I finished the FPV setup on Friday I’ve managed to fit in three FPV sessions, and I loved every minute of them. I’m gradually building confidence and I can’t wait to fly in more locations and try some tricks. Below I’ve embedded a video of some footage from my most recent FPV session.