Project: Keyboard Conversion
Over the course of this year I have have developed an interest in mechanical keyboards, largely thanks to the /r/mechanicalkeyboards subreddit. This is probably one of the tech related niches that seems the strangest to outsiders, especially looking at the small subset of hardcore enthusiasts willing to pay hundreds of dollars for just a single keycap.
Nevertheless, outside of the obsession with novelty keycaps, having a keyboard that looks and feels good makes perfect sense for someone likely to be typing for a good many hours. Sometimes on the subreddit there would be stories of people finding unusual or interesting keyboards such as the IBM Model M for sale in unlikely places, so for a little while I decided to search eBay to see what I could find.
The Keyboard
What I ended up finding is the keyboard shown in the image below. The seller didn’t have a lot of information about it, but was very helpful when I contacted him and helped me establish that it does indeed use mechanical switches, so for £20 with free shipping I thought I’d buy it and see what I could do with it.
Clearly it has an unusual layout, with keys like “Extend char” and “Delete line”. Upon inspection of the keyboard and some research I found that it was built in 1990 by a UK-based company called Devlin Electronics who specialise in custom input devices for specialised applications, which makes sense for this keyboard, given the unusual key layout and form-factor.

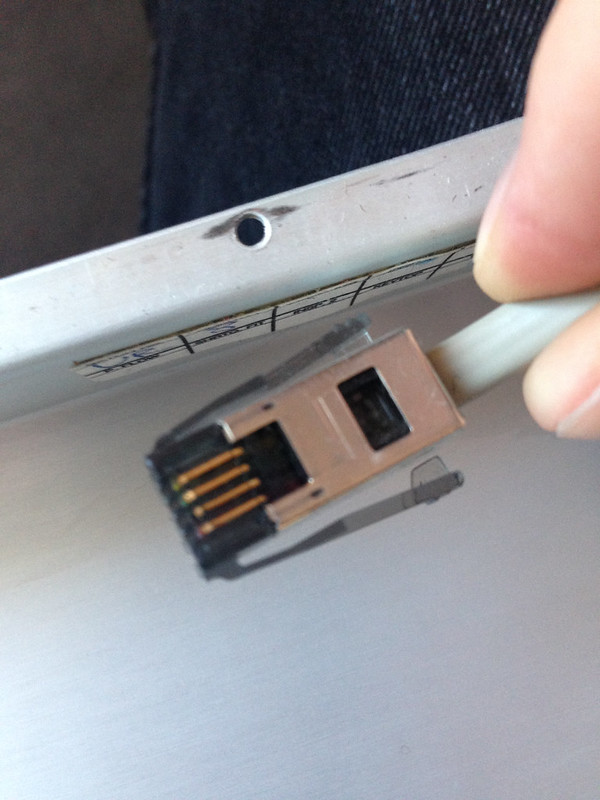
Being most likely a custom job for some industrial application, you could probably have guessed that this keyboard didn’t have a USB or even PS/2 connector. Instead it had the unusual looking connector shown in my next image, which thanks to Reddit user we_cant_stop_here I was informed is actually a connector used for certain HP terminals, whose keyboards also have a similar key layout to this one. I also managed to find out that the switches used in this keyboard are Mitsumi miniature, a linear mechanical switch, and in my case the switches have stems (the parts that connect the switch to the keycap) compatible with the popular Cherry mechanical switches and therefore the keys from this board would also fit on most other mechanical keyboards.

Although PS/2 to USB converters are fairly hard to come by, people in the mechanical keyboard community don’t regular come across keyboards built for HP terminals, so there wasn’t going to be an easy option for me, in hardware or software. That didn’t deter me though, as this presented itself to me as an interesting project for me to work on.
Upon opening up the keyboard, I was presented with some interesting circuitry, many times larger than what you’d find inside any modern USB keyboard. As you may be able to see in the image, the key switches are wired together in a matrix on a printed circuit board, with the rows and columns then travelling along header pins to a daughter board on the underside. This board contains some through-hole components, including the chips used to implement the protocol used to communicate with the HP terminal.

Since this daughter board could be easily removed by simply sliding it off the header pins, I decided that rather than trying to convert the HP protocol to USB, I would replace the board with something else and connect a controller directly to the matrix pins. I kept the daughter board as a curiosity. All I had to do now was decide what the ‘something else’ to replace the board with and drive the matrix would be. Again I got my answer here from we_cant_stop_here, who suggested a few different open-source keyboard firmwares I could use to accomplish this.
Programming the Firmware
After looking a few of the commonly-used firmwares, I decided to go with TMK Keyboard. These firmwares run on Atmel AVR microcontrollers such as the Teensy and are used by keyboard enthusiasts wishing to build keyboards with custom layouts and extra features such as LEDs. To get started with extending TMK Keyboard to work with the Devlin keyboard, I used this helpful guide. It essentially just involves modifying some C arrays in a way that defines the layout of your keyboard and how the matrix is connected together. There is much more functionality for things like macros, LEDs and multiple function layers, but in my case I didn’t need any of these features.
It turned out that the hardest (or most time-consuming) part of the project would be figuring out where each key is connected in the matrix, there wasn’t really much logical order to how the PCB was wired, so I spent many hours probing rows and columns with my multimeter and pressing keys. Eventually I managed to figure out the layout and modify the files in the TMK firmware accordingly, and after much debugging I got the keyboard to a fully working state. Of course since the keyboard contains a lot of unusual keys and keys in odd places I had to make some compromises, so the layout takes a bit of getting used to when using keys such as ctrl.
Wiring it Up
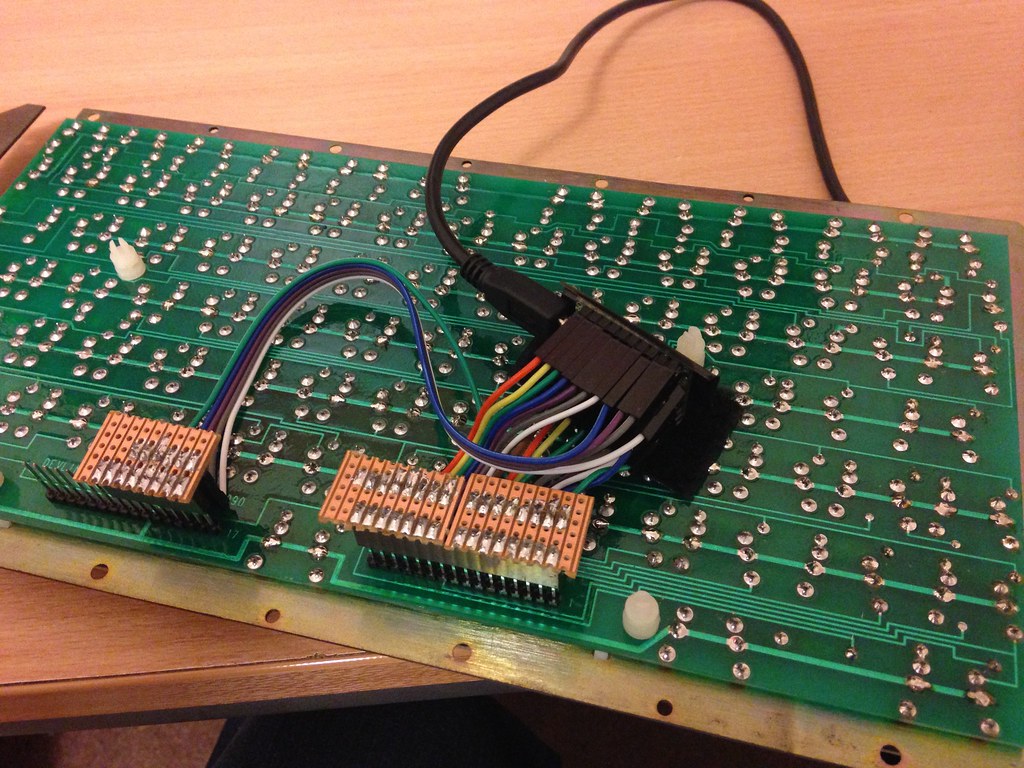
Next I just had to install the Teensy inside the keyboard in a somewhat permanent way. The header pins that were used to connect the matrix to the controller PCB were thicker than the ones used on the Teensy, so I soldered up some stripboard to allow me to connect the Teensy pins to the matrix while still maintaining the ability to remove the connectors from the matrix PCB like in the original design. The Teensy is secured in place using Velcro until I figure out a better way, but for now this seems to work quite well. The USB cable from the Teensy comes out of the hole in the metal keyboard chassis just like the original cable did, and now it works straight away just like an ordinary USB keyboard!

All in all it was an enjoyable and rewarding project, I’ll definitely keep an eye out for more interesting or unusual keyboards. I’m not using it as my main keyboard, currently that title belongs to my aluminium Apple Compact Wired Keyboard, which was unfortunately discontinued, although I am in the market for a mechanical keyboard!