Project: Quadcopter Build
Quadcopters are something I’ve been interested in for some time, when I first saw one I was amazed by the agility and stability it displayed and immediately wanted to know more. Being a programmer, the fact that carefully designed control software is the only thing that allows quadcopters to stay in the air furthered my interest. Since then I’ve bought a couple of cheap RC quadcopters, which I’ve had a lot of fun flying.
Another thing that appealed to me about quadcopters and multirotors in general, is that as of recent years it has become very easy for a hobbyist to put together one of their own fairly cheaply, using standardised hardware and electronics. After having some experience of flying the aforementioned cheaper ready-to-fly quadcopters, I decided to take my hobby to the next level and do exactly this, build my own much larger quadcopter from hobby-grade parts.
A large portion of my interest and knowledge of multicopters and RC comes from Flite Test, an excellent YouTube channel that creates high-quality videos about all aspects of RC and has entertained me a great deal. They also run a website for hobbyists to share their knowledge and projects. Flite Test have their own range of RC aeroplane and multirotor frame kits, and my quad is based around their Rotor Bones series of frames.
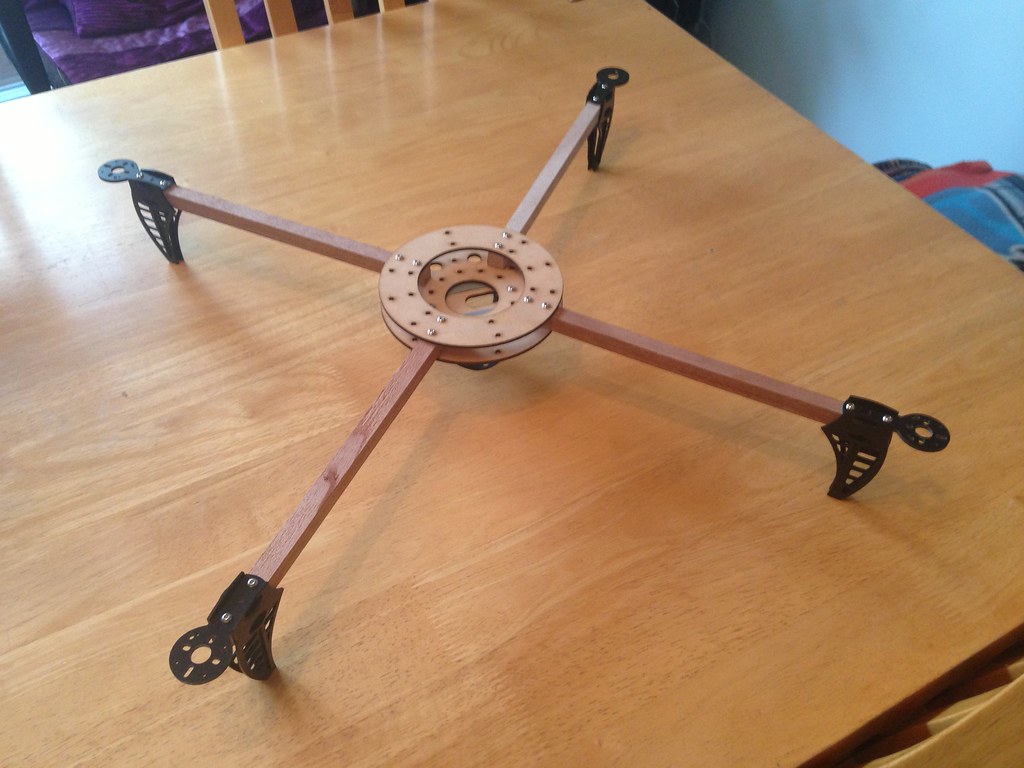
The assembled Anycopter frame.
The Rotor Bones Anycopter frames consist of 3, 4, 6 or 8 (depending on the desired multicopter) wooden booms with black delrin landing legs connected to a circular hub. In my case I’m building a quadcopter so I’ll be using 4 booms, but a benefit of this frame is that if at some point I decide I want a hexacopter or octocopter, all I need to do is add more booms and parts to the existing frame. When assembled, the frame looks very sturdy and rather nice.
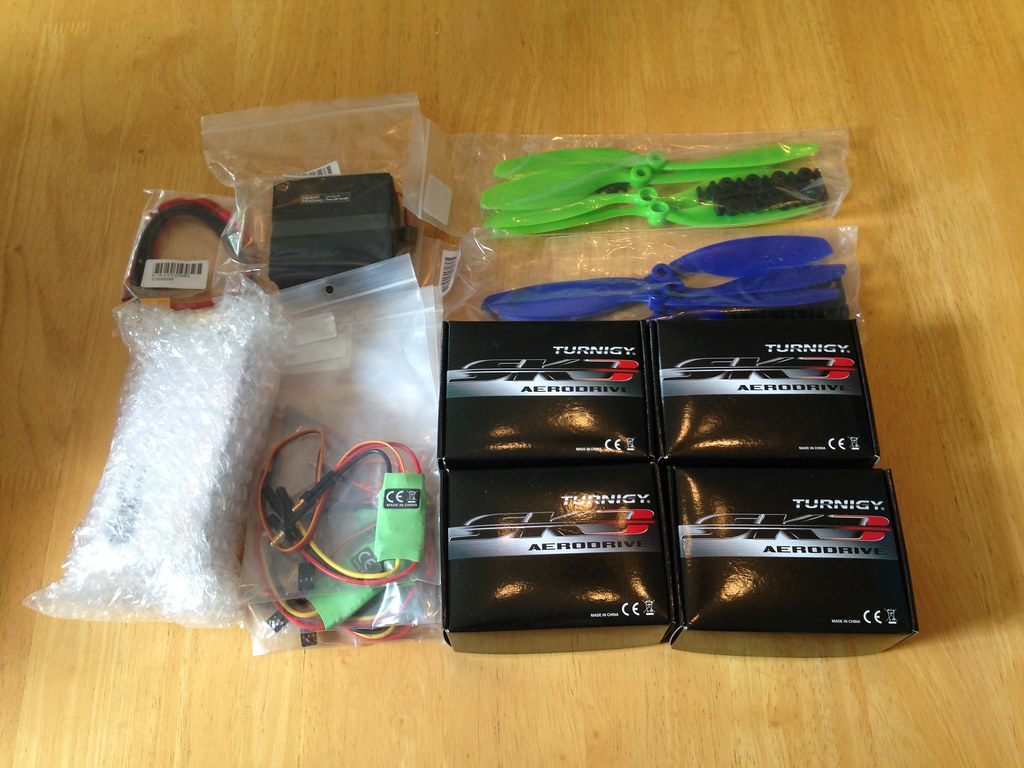
The electronics arrive!
After a few weeks waiting for all my electronics to be in stock on HobbyKing, they were shipped and on their way. For those unfamiliar with multirotors, this consisted of a lithium polymer battery, motors, propellers, speed controllers (ESCs) to drive the motors and a control board to act as the brain of the copter. I already had a radio transmitter and receiver to control the quad. For those interested, here is a listing of my parts:
- HobbyKing KK 2.0 Multi-rotor Flight Control Board
- Turnigy 2200mAh 3S 20C LiPo Battery
- Turnigy Aerodrive SK3 2822 1275Kv Brushless Motors
- Turnigy Multistar 15A ESCs
- 8045 SF Propellers
For anyone with with experience building custom PCs, assembling a multirotor is not too different. You pick out your parts, order them, wait for them to arrive and then connect them up, with a small risk of destroying something if you get it wrong. When my parts arrived I eagerly fitted them to my frame, and thankfully everything worked!
The last step was to balance my propellers, which is often overlooked but very important. The process used to manufacture the propellers is not perfect, and so one side is normally slightly heavier than the other. These imbalances may be small, but at high propeller speeds they can cause vibrations which interfere with the multirotor’s sensors, causing unsteady flight. This is even more important if the multirotor has a camera mounted, as the vibrations will cause shaky video and blurred photographs.
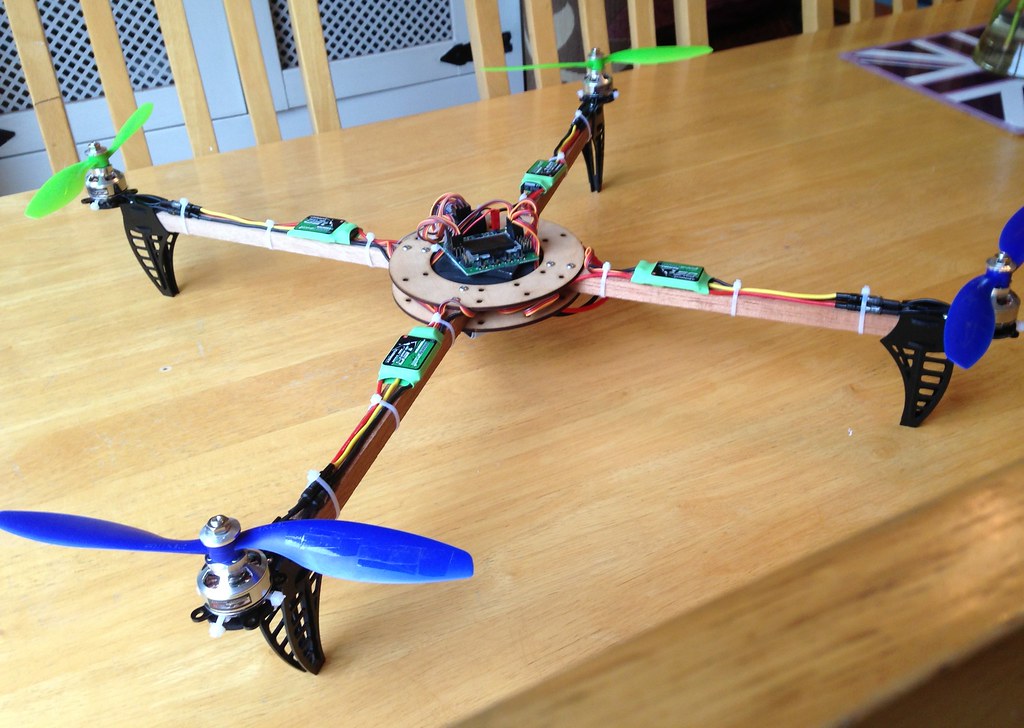
The finished quadcopter, you can see the tape on the propellers which is being used to balance them.
After finishing all this a few days ago, today was the first chance I had to give the quadcopter its maiden flight. I took it out into the garden, set it down in the middle of the grass, armed it and when I increased the throttle it took off beautifully! I’m very glad that it worked first time, since in the past I’ve had a lot of trouble. It was a little bit touchy but other than that very stable and under control.
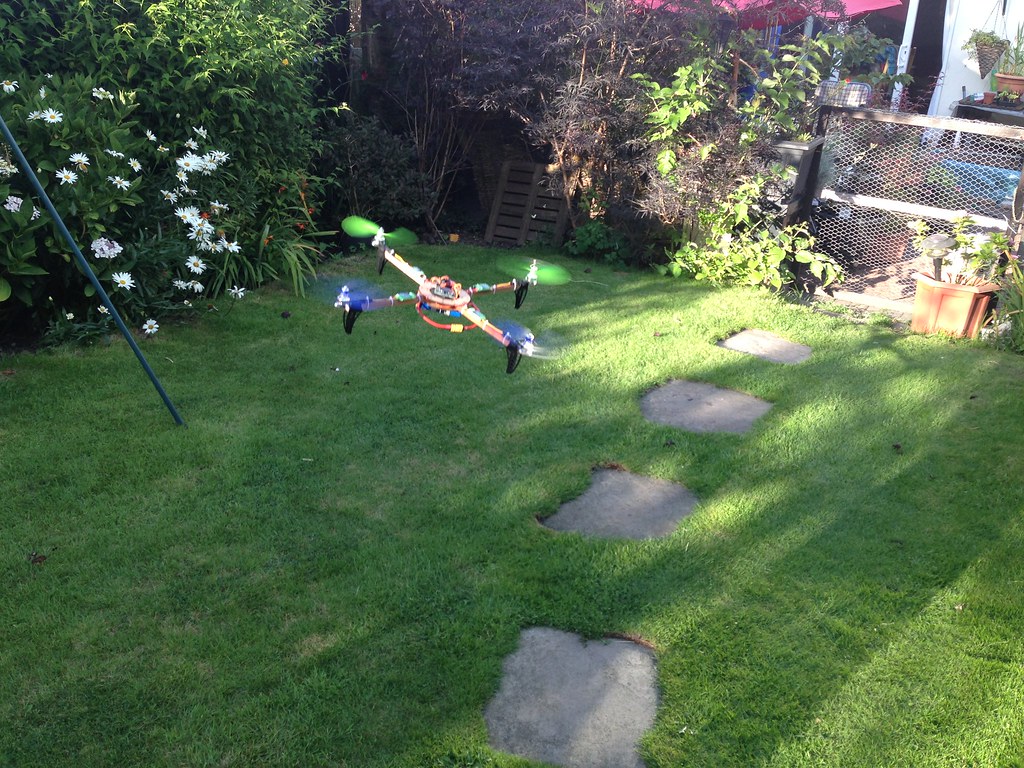
The Maiden Flight
I hope you enjoyed this build log and that I might have transferred a small part of my enthusiasm for multirotors onto you. The next thing will be to properly calibrate and configure all of the settings on the KK 2.0 board in order to get the kind of flight performance I’m looking for. After that, I’ll be looking forward to taking it out for its first proper flight!